
Constructions with a compass

Tools of the trade
Every profession has particular tools that they use all the time, a chef has their knives, the sewer a machine and the mathematician, well they have their construction tools.
No, not hammers and hard hats - Mathematicians use a compass, pencil and a straight edge.
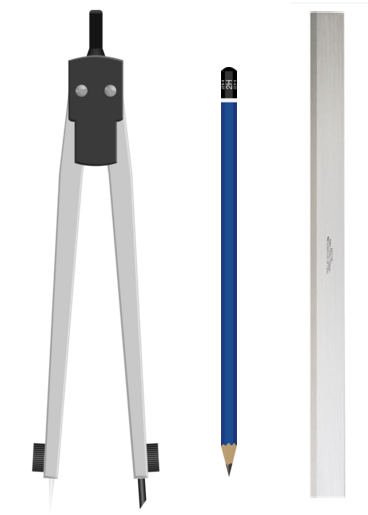
From just these three things we can create (nearly) all of what we require in geometry.
Notice how I used the word straight edge and not ruler. Well that's because all we really need for the constructions is a straight edge, we often don't even need numbers!
A great Greek mathematician named Euclid, who is credited to have written the first mathematics text book over 2000 years ago, went to great lengths to detail many of the mathematical constructions we will look at today. Geometrical constructions were so important to mathematics at the time because most problems were solved graphically, not arithmetically.
Constructions
This page will take you now through a series of basic constructions.
Basics
Basic constructions
- Congruent line segments
- Congruent angles
- Bisect a line segment
- Bisect an angle
- Perpendicular lines
- Parallel lines
Basic self explorations
- Equilateral triangles
- Isosceles triangles (given base and side lengths)
- Copy a triangle
We have another page on more intermediate constructions, there we will cover the following.
Intermediate constructions
- Angles (30, 45, 60 and 90 degrees)
Intermediate self explorations
- Triangle (SSS, ASA, AAS, SAS)
- 30,60,90 Triangle
- Quadrilateral midpoints
- Triangle medians
- Triangle altitudes
- Parallelogram
- Square
- Construct 75, 105, 120, 135, 150 degree angles (and more...)
If you want to jump right in here, then go to the intermediate page.
Basic constructions
Congruent line segments
Congruent means same, so congruent line segments are 2 (or more) lines that are exactly the same length. They can be facing in any direction, but if they are the same length then the lines are congruent. You can think of congruent line segments as copies of each other.
To construct congruent line segments you need a compass and a straight edge (ruler).
- Start with the line segment AB on the page that you want to copy.
- Mark a point on the page where you want the start of the copied line segment. Call this point C.
- Use the compass to measure the length of the original line segment AB.
- Without changing the compass width, move the compass to C.
- Draw an arc, the endpoint of the new line segment can be anywhere on the arc.
- Choose a point (D) on the arc and draw the line segment CD with the ruler.
- AB \equiv CD
Congruent angles
As we just saw with congruent lines, congruent means same, so congruent angles segments are 2 (or more) angles that are exactly the same size. They can be facing in any direction, but if they are the same size then the angles are congruent. You can think of congruent angles as copies of each other.
To construct congruent angles you need a compass and a straight edge (ruler).
- Start with the angle BAC (\angle BAC) on the page that you want to copy.
- Draw a ray PQ on the page.
- Position the compass on point A, adjust to any width.
- Draw an arc that crosses both legs of \angle BAC, name the points where the arc intersects the rays F and G.
- Position the compass on point on point P, and draw another arc. Where it crosses ray PQ call it M.
- Measure the distance FG with the compass.
- Place the compass at point M, and cross the arc. Call this intersection N.
- Draw in a ray from P, through N. Call it PR.
- Now you have created \angle RPQ.
- \angle RPQ \equiv \angle BAC
Bisect a line segment
In geometrical constructions, bisect means "cut in half". So to bisect a line segment means to cut the line segment in half, or find the halfway point.
To bisect a line segment you will need a compass and a straight edge (ruler).
- Start with a line segment AB.
- Place the compass on A.
- Adjust the width of the compass to what you think looks to be just over half way.
- Draw an arc on both sides of the line.
- Move the compass to point B, and cross the arcs you just created with new arcs.
- With the ruler, draw the straight line between the two intersections.
- This line bisects the segment AB.
In fact this is a very special line, it is called a perpendicular bisector which means it not only cuts the line in half, but the line is perpendicular to the segment, (at right angles to it).
Bisect an angle
To bisect an angle means to cut the angle in half. To bisect an angle you will need a compass and a straight edge (ruler).
- Start with angle ABC (\angle ABC)
- Place the compass on the vertex A.
- Adjust the width of the compass to any length
- Draw an arc on both legs of the angle. Call these intersection points M and N.
- Move the compass to point M, and draw another arc on the interior of \angle ABC
- Don't change the width of the compass, move to point N and cross the arc with another.
- Draw a line from the vertex B to this intersection with the ruler.
- This line bisects the angle.
Draw perpendicular lines
There are a few ways to construct lines that are at right angles to each other (perpendicular). This method is going to construct a pair of perpendicular lines (create a right angle), by starting with a line and point on the line. The right angle will be at the point.
- Start with a line
- Place a point on the line (A)
- With the compass set at any width, place the compass on A and mark the arc on either side of the line. Call these points M and N.
- Place the compass on M, and set the width to be between A and N. Draw an arc.
- Keep the width the same, move the compass to N and draw another arc. Name the point of intersection B.
- With the ruler, draw the line through B and A. This line is perpendicular to the line through M and N.
Another way to construct perpendicular lines.
Draw parallel lines
There are a few ways to construct lines that are parallel to each other. This method is going to construct a pair of parallel lines by starting with a line and point for the constructed line to pass through. This method is called the angle copy method as it uses corresponding angles to create the parallel lines.
- Start with a line (AB)
- Place a point where you want the parallel line to pass through (C)
- With the ruler, draw a line through C to any point M on line AB.
- Place the compass on M, with the width set to just over half the distance of MC and draw an arc across both lines
- Keep the width the same and move the compass to C. Draw another arc.
- Move the compass to the intersection of the first arc and line MC, and measure the distance from there to where it crosses line AB.
- Mark this distance on the upper arc. (call the intersection D)
- Draw a line through C and D. This line is parallel to AB.
Basic self-explorations
The following are three challenges for you to try. They use the skills we have just explored:
Start by considering the special properties that relate to these objects and then have a go at creating them.
- Equilateral triangle
- Isosceles triangle (given base and side lengths)
- Copy a triangle (congruent triangles)